
Get your Live business
You need a Live Whop business, the account inside Whop that will actually receive your customers' money, before you can take real payments. Live is Whop's real-money environment, separate from the Sandbox business you tested with earlier.
The recommended way to get one is to create it from WHMCS. Our service creates the business under our Whop Partner account, applies the account settings WHMCS needs, and then transfers ownership to you, so the business is yours once you accept the invitation. Whop then shares part of its revenue from your payments with us instead of you paying for the plugin, which is why it is free. If you would rather use a business you already manage, prepare it yourself using Path B below.
Whop is the merchant of record for card network rules and payment settlement. It is not the seller of your services, and this integration does not use Whop's merchant-of-record tax handling: you stay responsible for tax, and WHMCS calculates it. That is why we recommend creating the business through WHMCS, and why it is still worth checking the settings yourself.
Before you start
- Use one Whop business per WHMCS installation; see Connect WHMCS to Whop for why. If you need a second business for another WHMCS installation, request it from that installation's own Step 1 card, which is the recommended route. You can also open one directly through our partner link: Create a Whop business.
- Know the business email you want to use. Whop sends the ownership invitation there, so use an address the intended owner can actually open.
- Have your business details ready if you want to enter them now: legal name, support email, address, tax ID and a logo. All of this is optional and can wait.
Path A: create the business from WHMCS
-
Open System Settings > Payment Gateways > Whop Payments (older WHMCS versions call this menu Setup) and expand Step 1: Your Whop account. Review Business name and Website, which use your WHMCS details, and enter or confirm Owner email. The owner email may be blank. All three are editable. Change the owner email if someone else, such as the actual business owner, should receive the invitation instead of you. A collapsed Optional business details section below lets you add a legal business name, address, support email, tax ID and logo now; leave any of it blank if you would rather add it in Whop later.
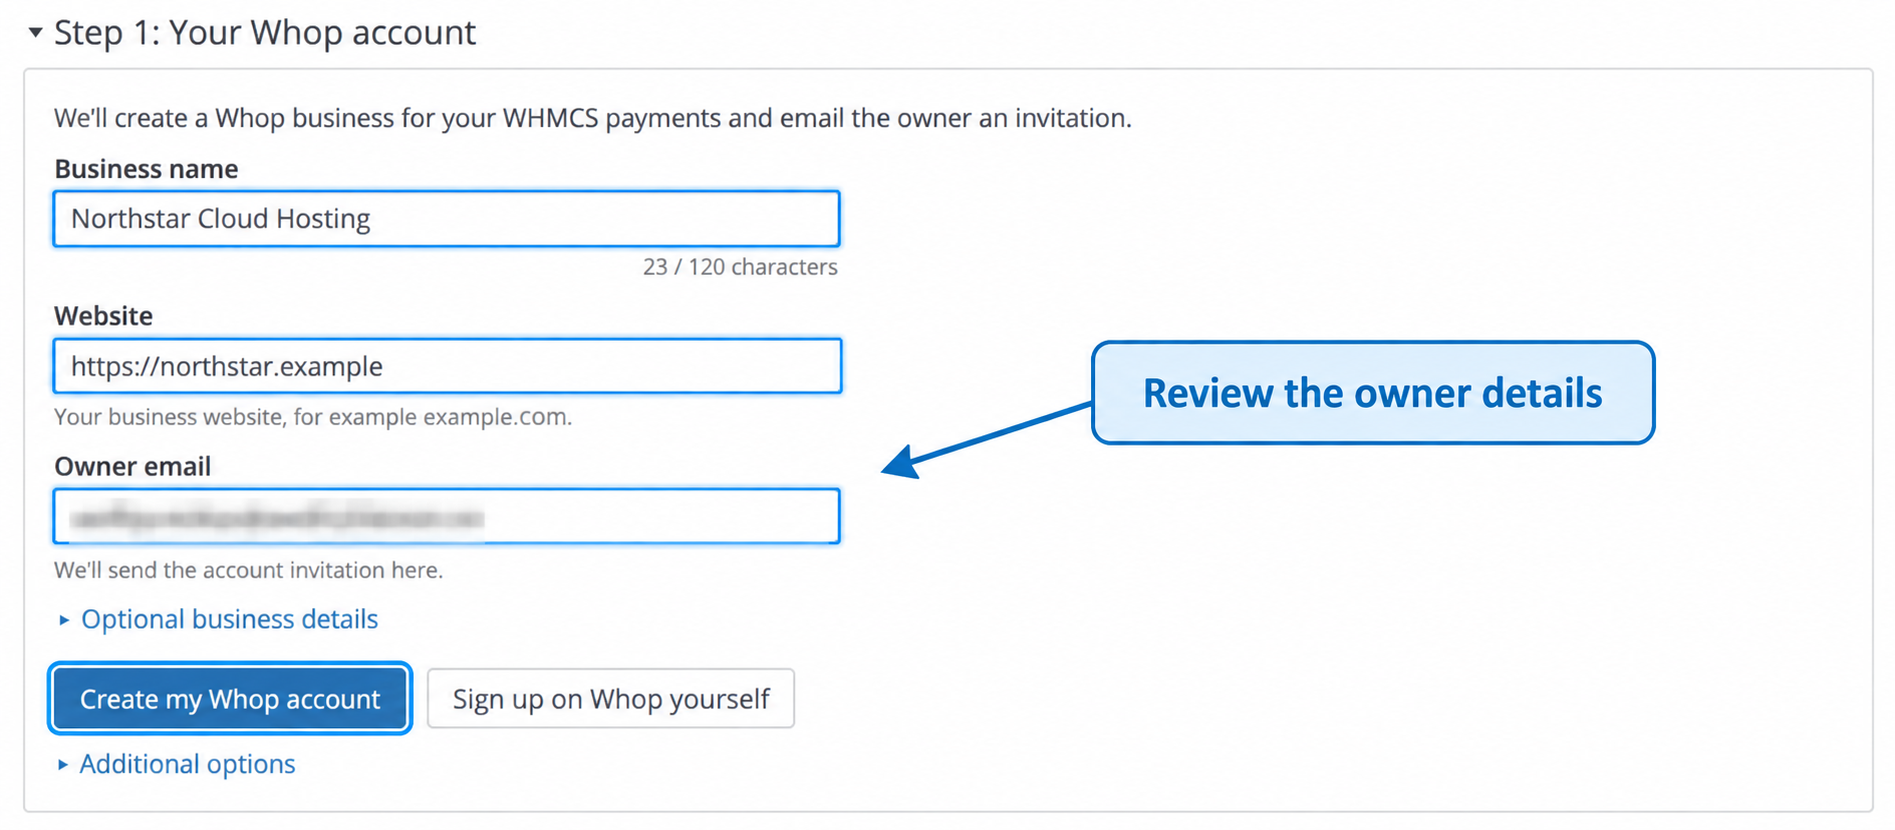
Live account setup: review the business name and website, then enter the email that should receive ownership.
-
Choose Create my Whop account. This sends those fields to our service, which creates the business and asks Whop to email an ownership invitation. Read the status that appears next:
- No badge yet: nothing has been sent. Fill in the fields and choose Create my Whop account.
- Not confirmed (amber): WHMCS could not confirm whether the request reached the service. Use Check status.
- Request received (blue): the service has your request and is working on it. Use Check status for an update.
- Invitation sent (green), with the owner's email shown: Whop emailed the invitation. Open it, accept ownership, then come back here to connect Live.
- Failed (red): something went wrong, and the message explains what, for example a business with that name already existing.
- Skipped (grey): you chose to use an existing business instead. See Path B below.
- Done (green, collapsed): Live is already connected. There is nothing left to do here.
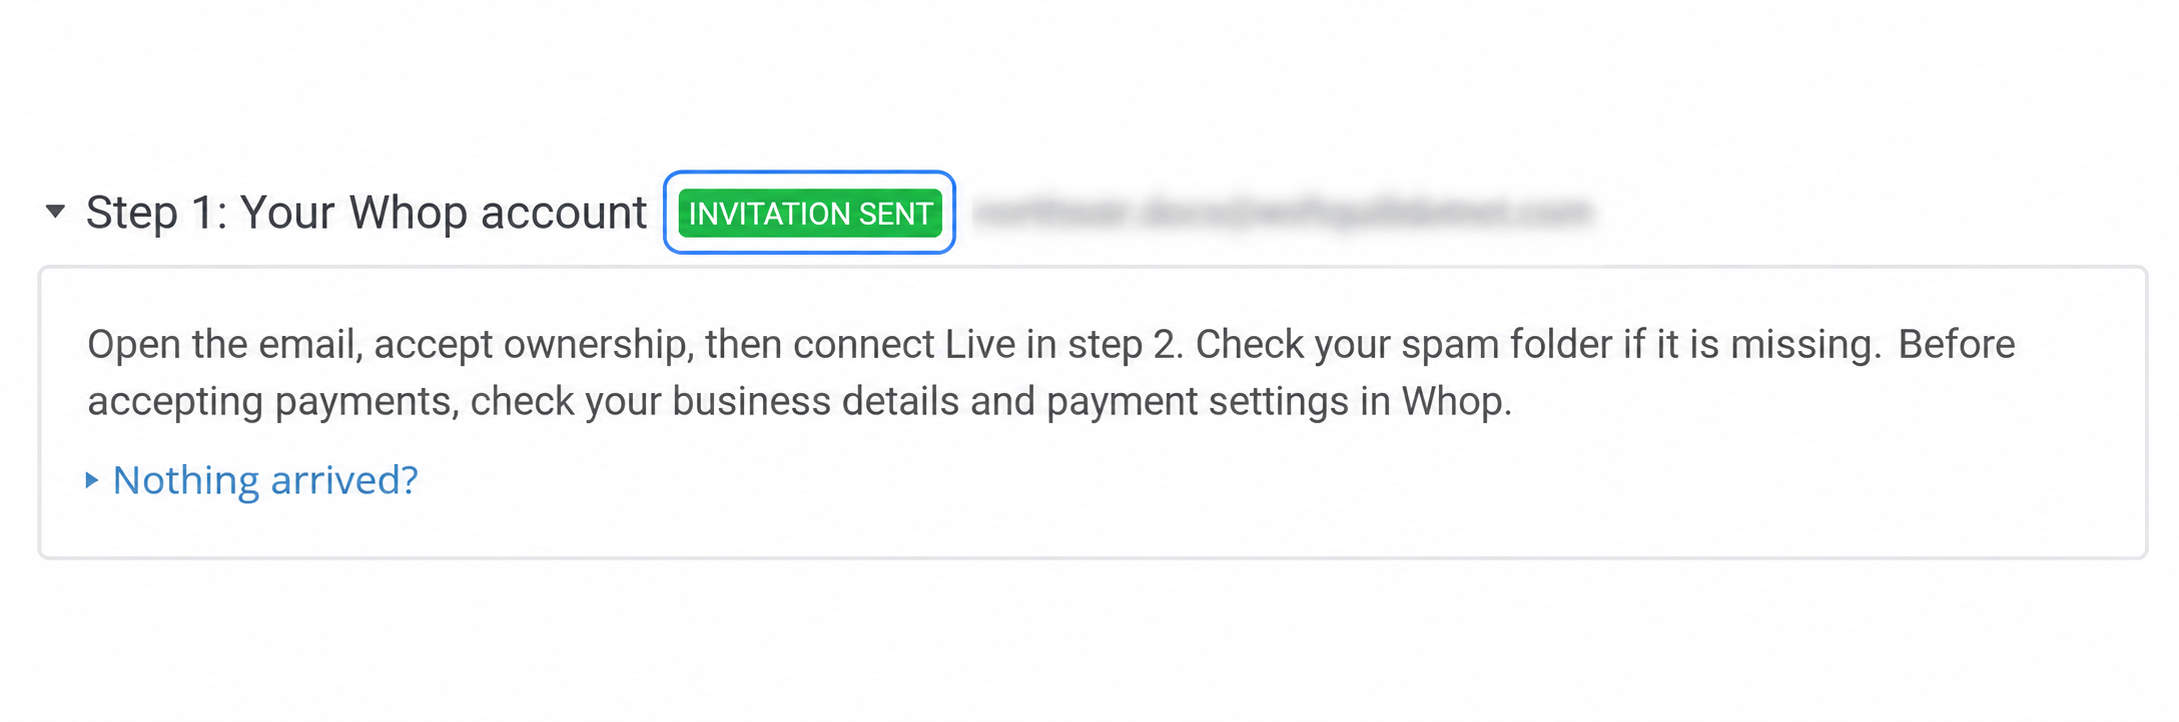
Live account setup: Invitation sent means the owner can open the Whop email and claim the business.
-
If the status is not yet Invitation sent, choose Check status for an update. Nothing happens automatically: you can leave this page and come back whenever you like, and clicking Check status never sends a second request by accident. Try creating again only appears once WHMCS is sure no business was created yet, so you never end up with two businesses from one request. Once the status reaches Invitation sent, a slower or worse answer that arrives later cannot take that back. Good news, once shown, stays shown.
-
Claim the business in Whop. Open the invitation email and accept ownership. Sign in with the email that received it, and confirm the business name and the Owner role when Whop asks. If nothing arrives, check the spam folder, or expand Nothing arrived? in WHMCS and choose Resend invitation.
-
If automatic creation fails without offering a retry, or you would rather set the business up yourself right away, choose Sign up on Whop yourself. This opens Whop's own sign-up page in a new tab through our partner link, the same one as Create a Whop business. Create the business there, then follow Path B below to connect it.
Path B: use an existing Whop business
Choose I already have a Whop account under Additional options in Step 1. This reveals the connection cards without starting a request. Open the business you want to use in Whop, review the settings below, create a Live API key with the permissions further down this page, then continue to Go live to connect it.
Verify your identity
Whop uses verification to confirm who receives the money. Individual verification confirms a person, and Business verification confirms a company. Complete the checks Whop requires for your account. The page also lists capabilities separately: for example, Payouts can be Active while Business verification still offers Get verified.
Open Settings > Verifications and follow the applicable Get verified action. Check the Payouts status before expecting a withdrawal to work. Payment limits and available methods can differ until Whop completes its review.
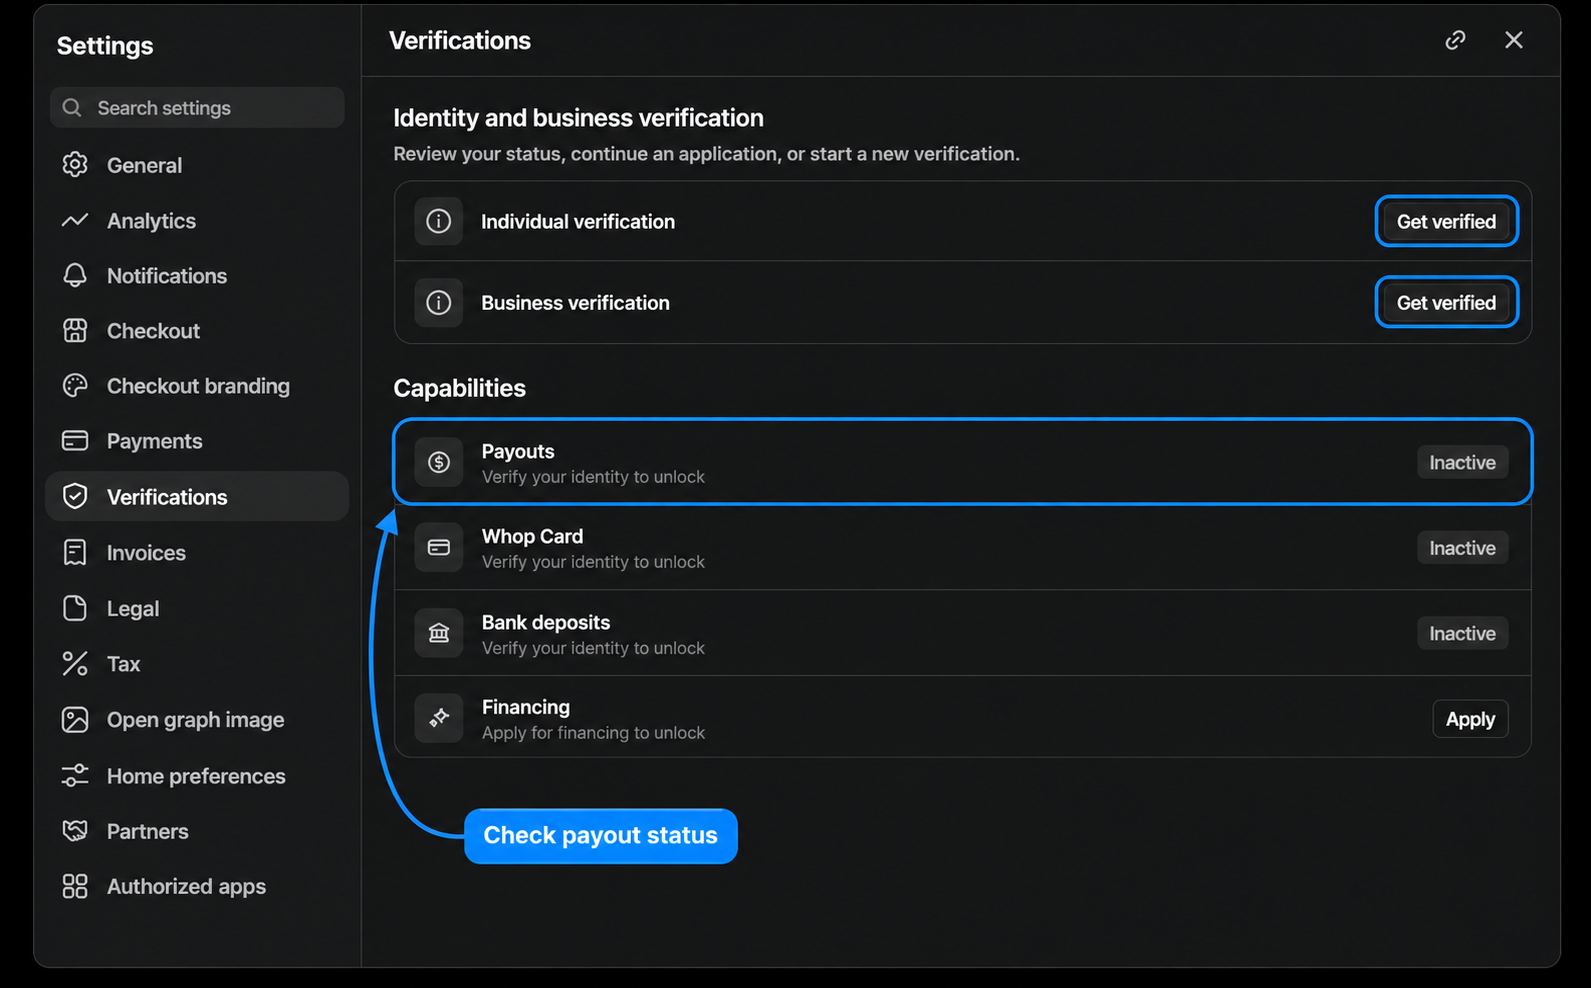
Live: verification and payout capability are separate statuses. Complete the checks Whop requests for your account.
A WHMCS connection that reads Ready is not the same as an approved payout. Ready means the module can create payments; it says nothing about whether Whop has approved your withdrawals yet.
Confirm the settings WHMCS needs
WHMCS's connection check confirms your account status, your card capability, your tax choice, the key permissions and the webhook. Of the settings below it confirms only the tax choice, so five minutes here is worth it.
| Setting | Where in Whop | Value it should have | Why |
|---|---|---|---|
| Payment orchestration | Settings > Checkout | On | Lets Whop try more than one payment processor per transaction, to raise the chance it succeeds. Whop shows its fee for this beside the setting. |
| Statement descriptor | Settings > Checkout > Custom statement descriptor | A name your customers recognize | Appears on their card statement. Without it, a charge can look unfamiliar. |
| Send transactional emails to your members | Settings > Checkout | Off | WHMCS already emails your customers their receipts and payment notices. Leaving this on sends two. |
| Tax handling | Settings > Tax | "I'll handle tax myself" | WHMCS already calculates the tax on your invoices. This stops Whop calculating a second amount. |
| Tax type | Settings > Tax | Inclusive | Keeps the amount Whop collects equal to the issued WHMCS invoice. |
| Collect VAT IDs from users | Settings > Tax | Off | Keep tax details and invoice calculations in WHMCS. |
| Payment methods | Settings > Checkout > Payment methods | Card on, plus anything else you want to offer | Decides what your customers can pay with. |
| PayPal | Settings > Payments | Set up if you want to offer it | It needs its own setup step in Whop before it can appear at checkout. |
| Wallet domain verification | Settings > Checkout > Apple Pay and Google Pay for embedded checkout | Your WHMCS domain verified | Whop asks you to verify the domains used for embedded wallet checkout. |
| Refund policy and automatic refunds | Settings > Payments | Thresholds you chose on purpose | Whop can refund a disputed payment automatically under these, without anyone touching WHMCS. |
| Checkout limit | Settings > Payments | Enough for your expected invoice amounts | Check the displayed limit and request a review if needed. Limits and review timing depend on the account. |
Review these values even after creating the business through WHMCS. In particular, confirm Tax type is Inclusive before connecting.
Use Configure beside Apple Pay and Google Pay for embedded checkout to register your WHMCS domain. Wallet availability also depends on a public HTTPS site and an eligible browser, device and wallet.
Whop's automatic refunds live under two separate controls in Settings > Payments: Resolution Center cases, where a buyer disputes a charge, and early dispute alerts, a warning Whop gets before a full dispute happens. Each carries its own dollar threshold. Review both and set them deliberately. Whop refunds the payment itself once a case falls under the threshold, before anyone here ever clicks Refund in WHMCS.
Create the Live API key
In the Live business, open Developer, find Company API keys, and choose Create API key. Name it something like "WHMCS Live". Set Inherit permissions from role to Custom and select these 21, the same ones you selected for your Sandbox key:
| Group | Permissions |
|---|---|
| Plan and payment | plan:create, payment:charge, payment:basic:read, payment:manage |
| Checkout and saved cards | checkout_configuration:create, checkout_configuration:basic:read, payment:setup_intent:read, member:basic:read, member:email:read, member:payment_methods:read, member:payment_methods:manage |
| Webhook management | developer:manage_webhook |
| Payment case notices | payment:dispute:read, payment:resolution_center_case:read |
| Incoming event families | webhook_receive:accounts, webhook_receive:payments, webhook_receive:setup_intents, webhook_receive:refunds, webhook_receive:disputes, webhook_receive:resolutions |
| Balance visibility | company:balance:read |
Live may show these under friendlier names. Match the raw name on the left to the label you see on the key form:
| Permission name | Live label |
|---|---|
plan:create | Create plans |
payment:charge | Charge payments |
payment:basic:read | Read payments |
payment:manage | Manage payments |
checkout_configuration:create | Create checkout configurations |
checkout_configuration:basic:read | Read checkout configurations |
payment:setup_intent:read | Read setup intents |
member:basic:read | member:basic:read |
member:email:read | member:email:read |
member:payment_methods:read | Read member payment methods |
member:payment_methods:manage | member:payment_methods:manage |
developer:manage_webhook | Manage webhooks |
payment:dispute:read | Read disputes |
payment:resolution_center_case:read | Read resolution center cases |
webhook_receive:accounts | webhook_receive:accounts |
webhook_receive:payments | Read changes to payments |
webhook_receive:setup_intents | Read changes to setup intents |
webhook_receive:refunds | Read changes to refunds |
webhook_receive:disputes | Read changes to disputes |
webhook_receive:resolutions | Read changes to resolution center cases |
company:balance:read | Read company balance |
Copy the key privately. You will paste it into WHMCS in the next step.
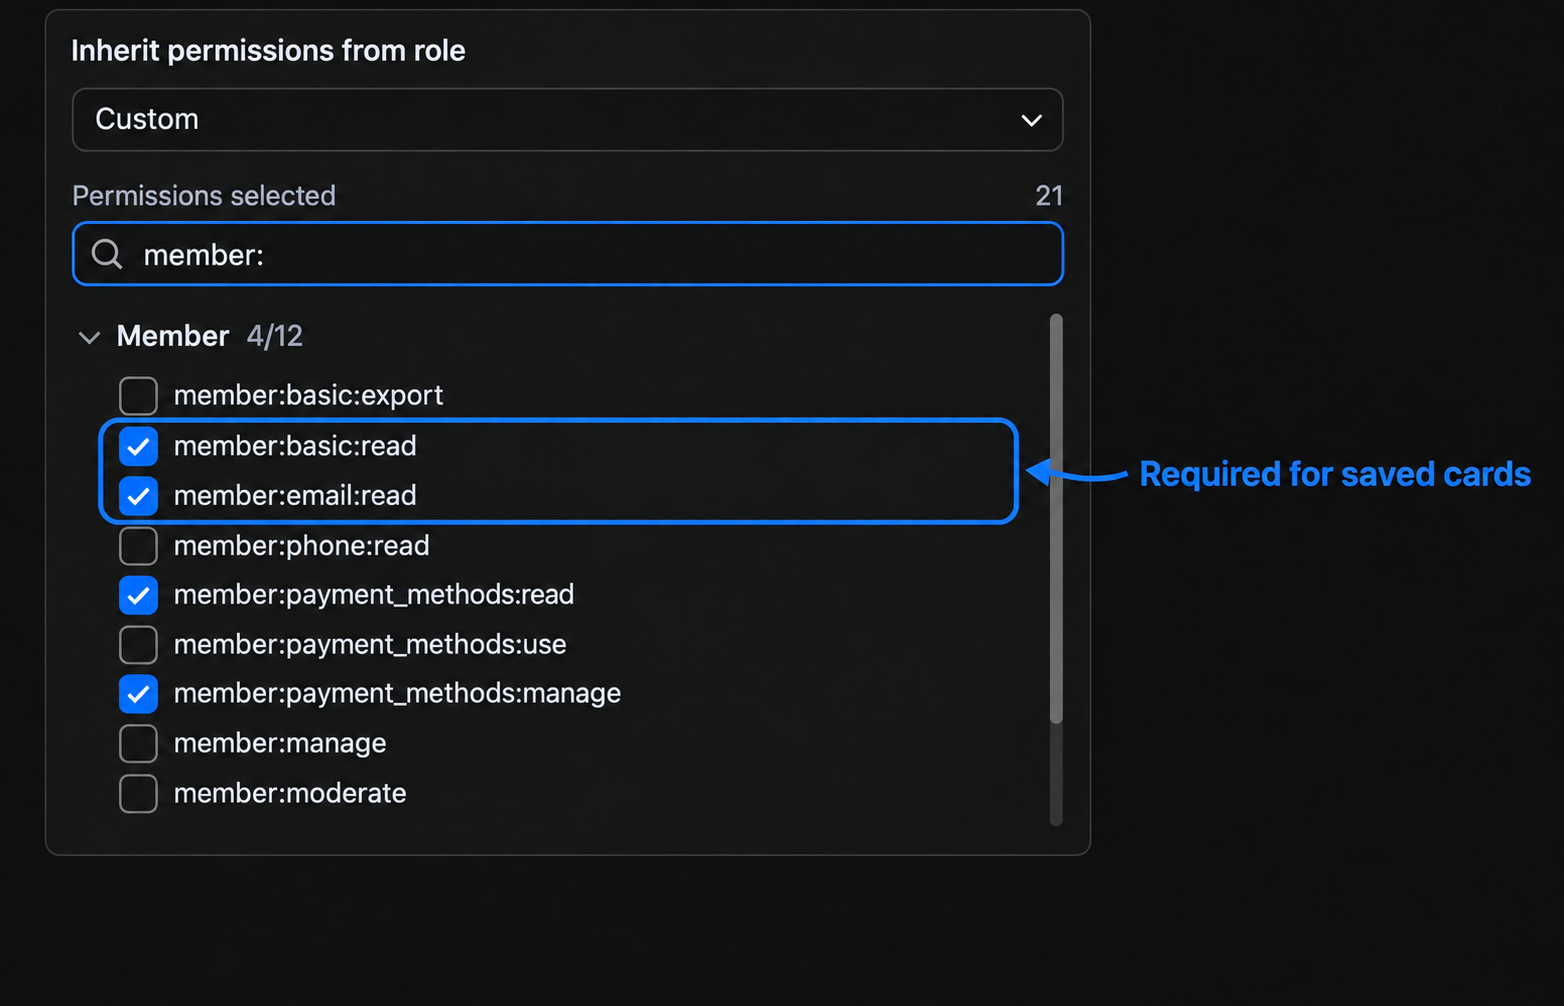
The Sandbox editor illustrates the same 21 permissions required for Live. Include both member-read permissions, then keep the generated key private.
Next: Go live
Updated 16 days ago