
Install the module
Whop is the payment platform this gateway connects to WHMCS. This page installs the module's files, then activates its two gateways.
Before you start
- Read Requirements and limits.
- Get a copy of the module package from the developer.
- Sign in to WHMCS as an administrator with the Configure Payment Gateways permission.
1. Upload the files
Extract the module package. Its upload/ folder mirrors a WHMCS installation. Copy everything inside upload/ into your existing WHMCS directory, keeping the same folder structure:
your-whmcs-root/
|-- whop-payment.php
|-- whop-complete.php
|-- includes/hooks/whop.php
|-- modules/gateways/
|   |-- whop.php               (the Whop Payments gateway)
|   |-- whop_checkout.php      (the Whop Checkout gateway)
|   |-- callback/whop.php      (the callback Whop calls after a payment)
|   |-- whop/                  (the whole module directory)
|   `-- whop_checkout/         (its manifest and logo)
`-- templates/
    |-- twenty-one/
    |   |-- whop-payment.tpl
    |   `-- whop-complete.tpl
    `-- six/
        |-- whop-payment.tpl
        `-- whop-complete.tpl
If you run another active system theme besides Twenty-One or Six, copy whop-payment.tpl and whop-complete.tpl into that theme's folder too. A child theme that inherits from one of these two already has them.
Done looks like: every file above exists at its listed path, and WHMCS still loads normally.
2. Activate Whop Payments
- Open System Settings > Payment Gateways (older WHMCS versions call this menu Setup).
- Find Whop Payments in the list of available gateways and activate it. Depending on your WHMCS version this list is the All Payment Gateways tab or the Apps & Integrations page.
- Open Whop Payments again and click Save Changes.
What you see: the panel opens on Step 1: Your Whop account.
Activating the gateway and saving it once creates the module's own database tables, where it stores your Whop connection and its in-progress payment work. Your actual payment records stay in WHMCS's own transaction list. It does not connect to Whop yet, and it does not make payments possible on its own.
Done looks like: Whop Payments appears in your list of active gateways, and its panel loads with no errors.
3. Optionally activate Whop Checkout
Whop Checkout is a second, optional gateway. It needs Whop Payments active first, and it shares the same connection, so there is nothing extra to connect.
- On the same list, find Whop Checkout and activate it.
- Open its panel and click Save Changes.
Done looks like: Whop Checkout appears in your list of active gateways, and its panel shows a note that its connection comes from Whop Payments.
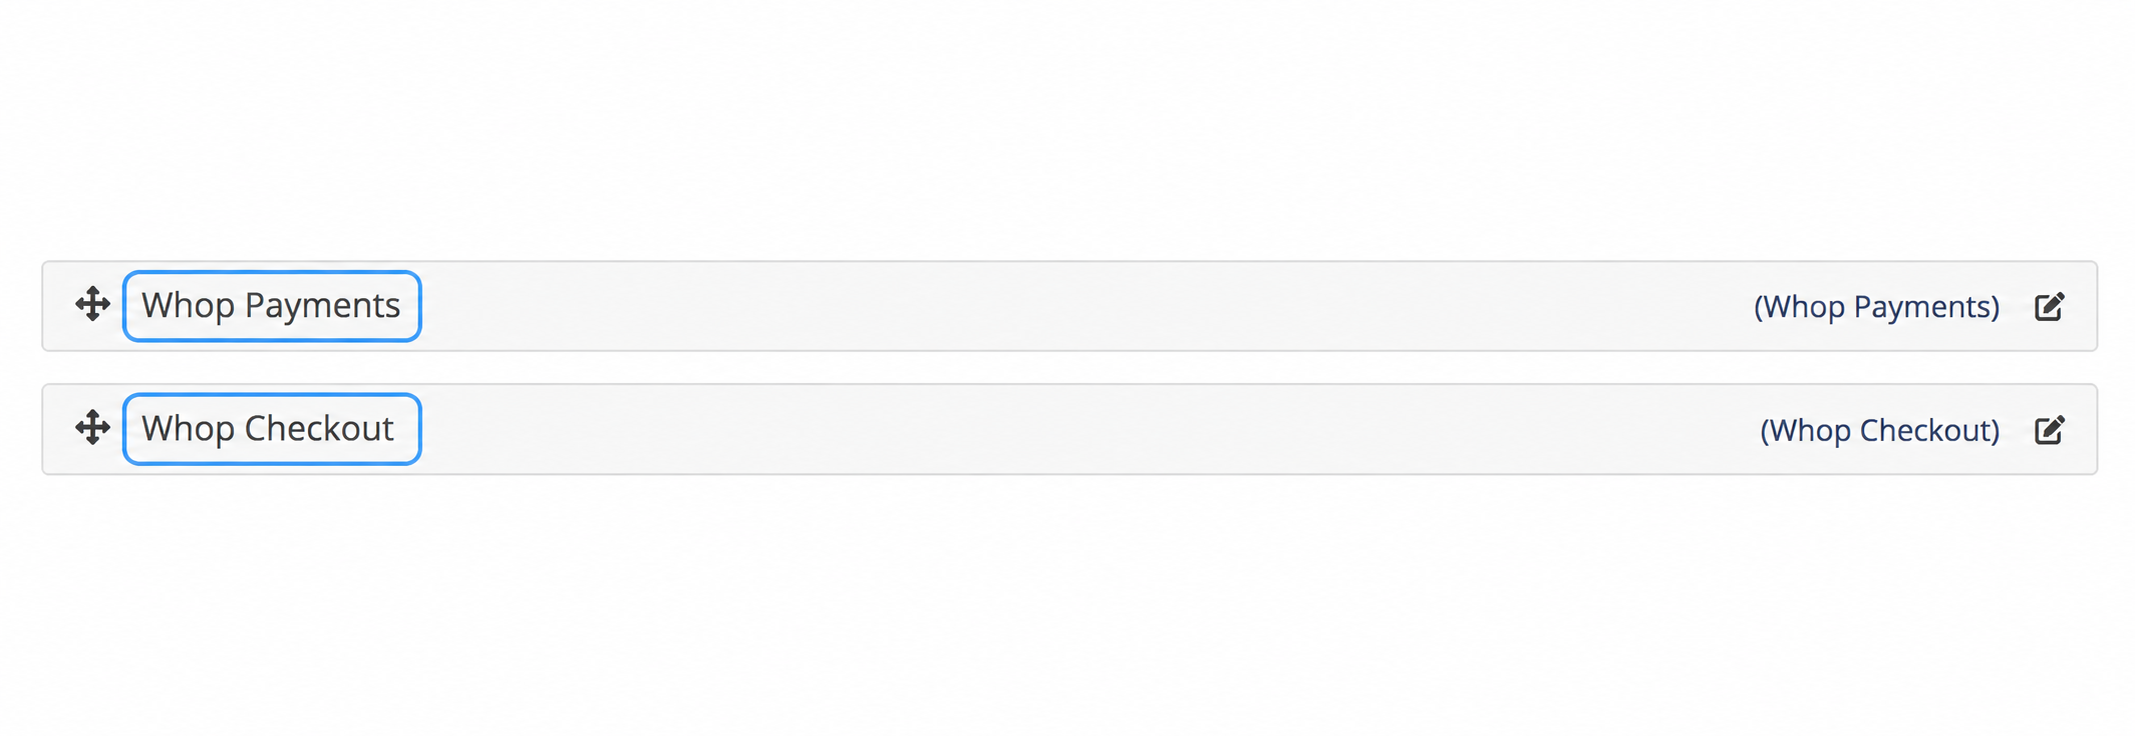
After both activations, Whop Payments and Whop Checkout appear in Manage Existing Gateways.
Check the result
Open Whop Payments. If you already have a Whop business, open Step 1: Your Whop account > Additional options and choose I already have a Whop account. This reveals Step 2: Connect Whop to WHMCS, with a Sandbox card and a Live card, both reading Not connected.
No payment is possible yet. That is expected: nothing is connected.
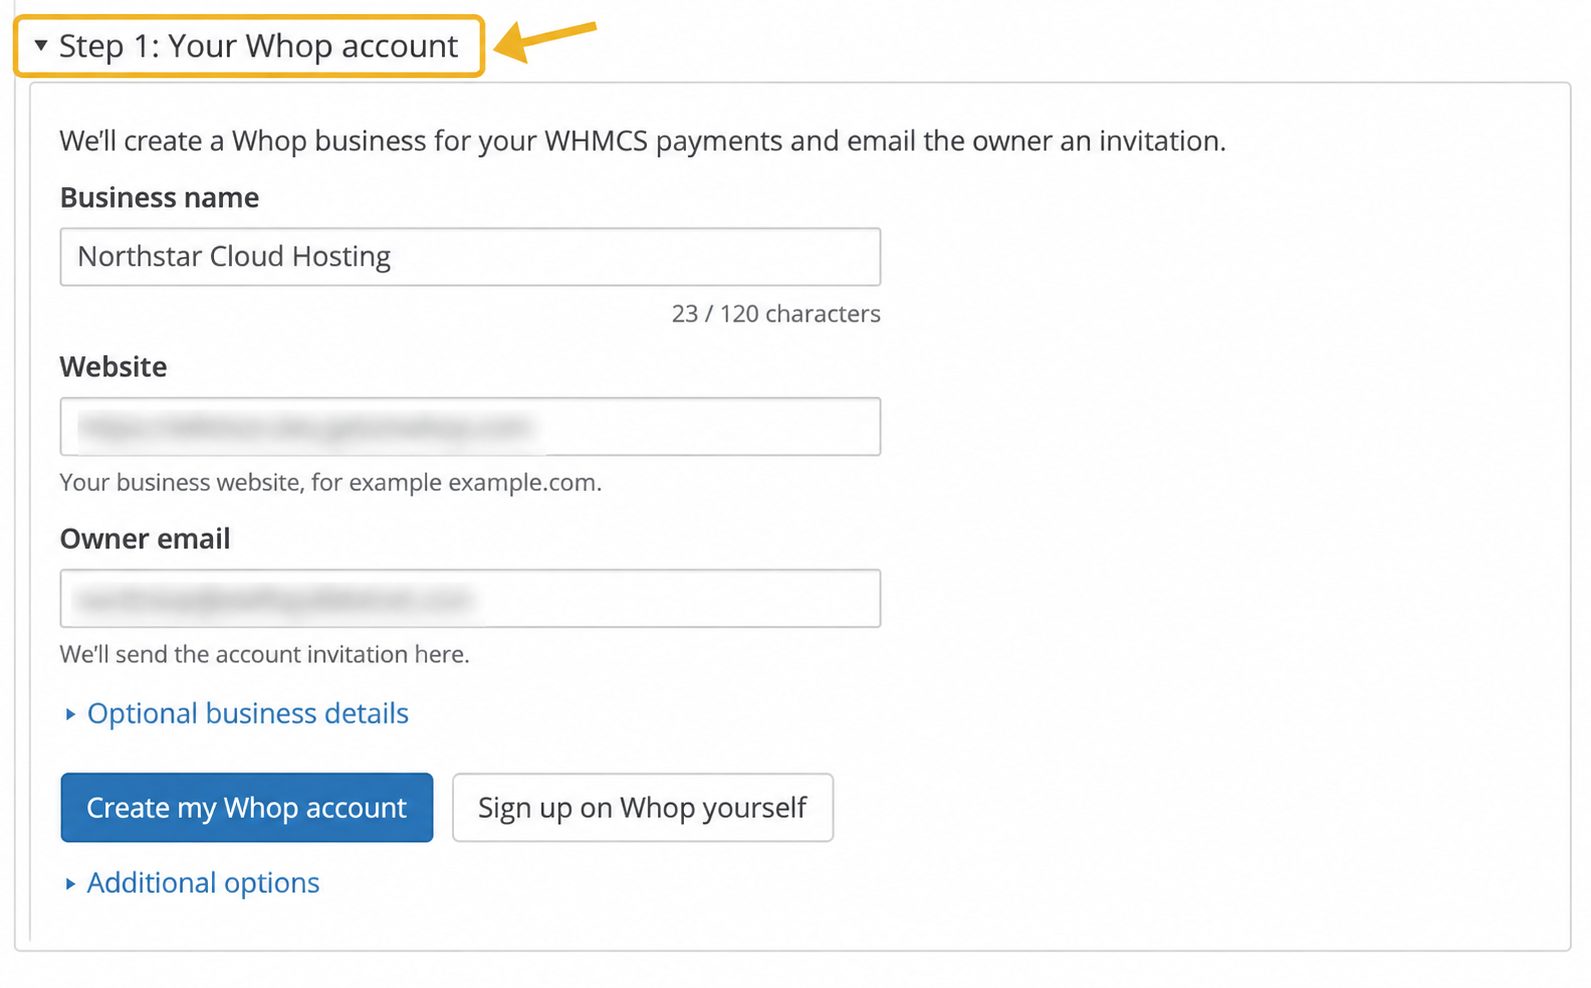
The Whop Payments setup panel appears after activation.
If a gateway does not appear, check the filenames and folder depth from step 1. See Troubleshooting for other install problems.
Updated 16 days ago