
Set up a Sandbox business
Whop is the payment platform behind this gateway. Sandbox is a separate environment with its own Whop business. This guide uses public test cards, never real money.
Before you start
You need a Whop login. Sign up for free when you open Sandbox if you do not have one yet. Everything on this page happens in the Whop dashboard. You will paste the key you create here into WHMCS on the next page.
1. Create your Sandbox business
- Open Whop Sandbox and sign in, or complete its sign-up flow.
- Choose Start a business. If you already manage one, open More in the business switcher at the top left, then choose Start a business.
- Choose I want a business to create a separate test business.
- On Name your business, enter a clear test name, such as "Northstar Cloud Sandbox", and choose Continue.
Done looks like: you are looking at your new Sandbox business, not a Live one.
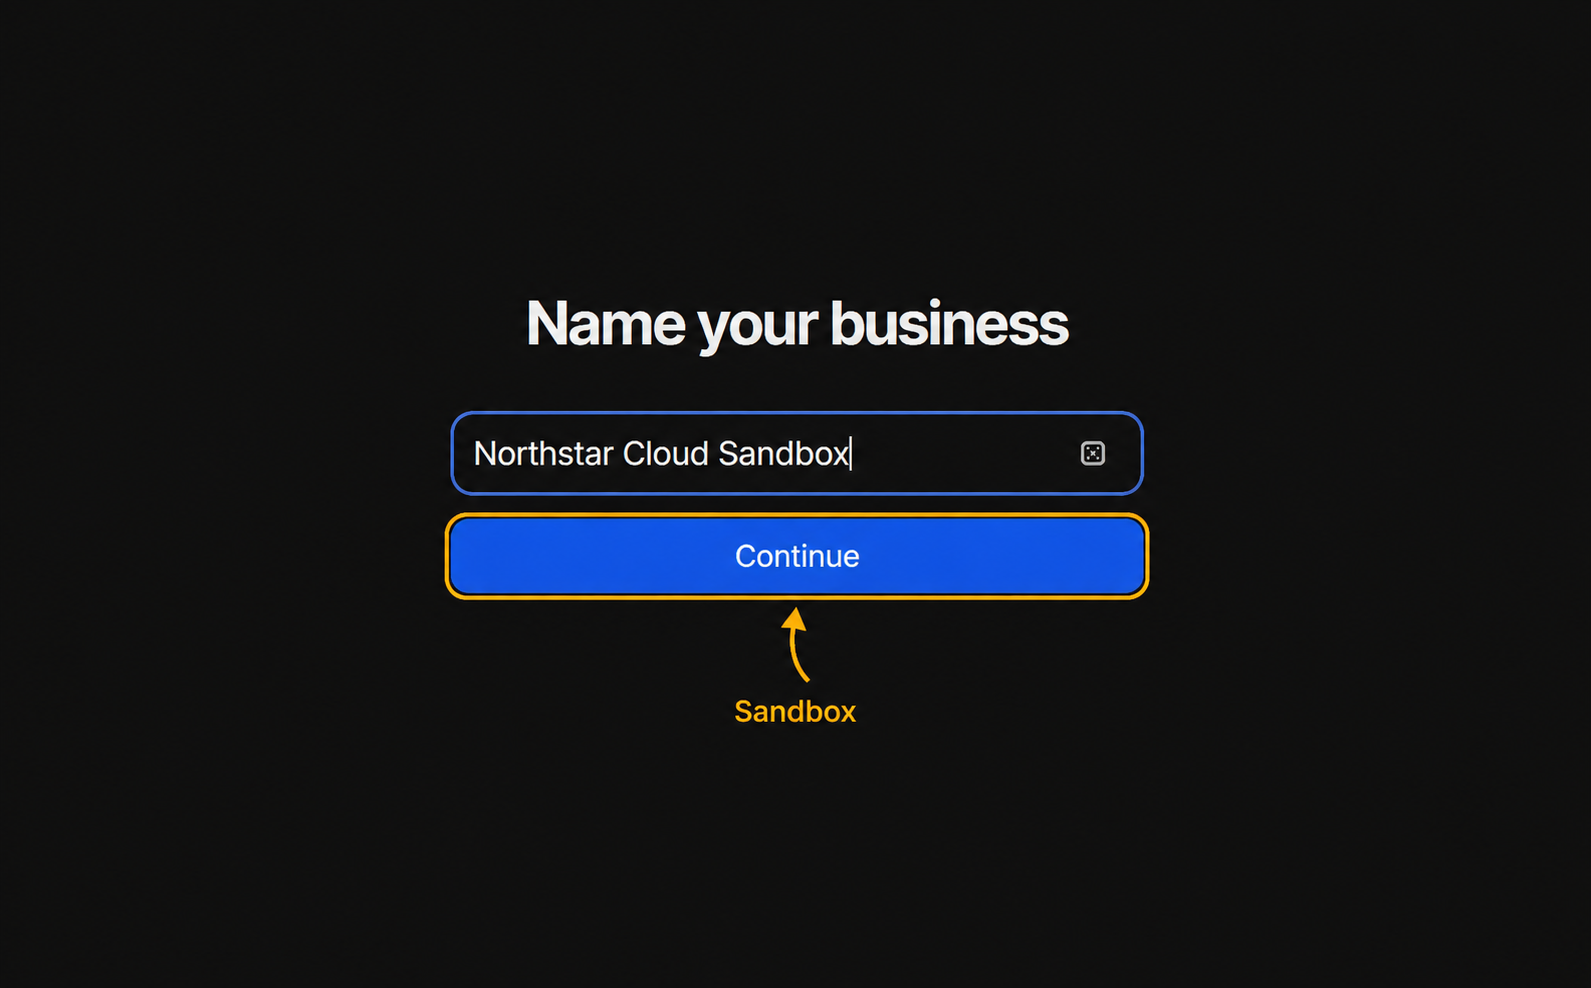
Sandbox: give the new business a recognizable name.
2. Open the business settings
Choose Settings at the bottom left of the business dashboard. Developer, just above it, is where you create the API key in step 6.
Settings opens a panel with its own navigation. Choose Checkout or Tax there. Sandbox uses the same main settings layout as Live.
3. Configure Checkout
Open Settings > Checkout.
| Setting | What to choose |
|---|---|
| Payment orchestration | On. It routes each payment to the processor most likely to accept it. |
| Custom statement descriptor | Optional. See below. |
| Send transactional emails to your members | Off. WHMCS already sends the invoice and receipt emails, so leave Whop's copies off. |
Done looks like: orchestration is on, and transactional emails are off.
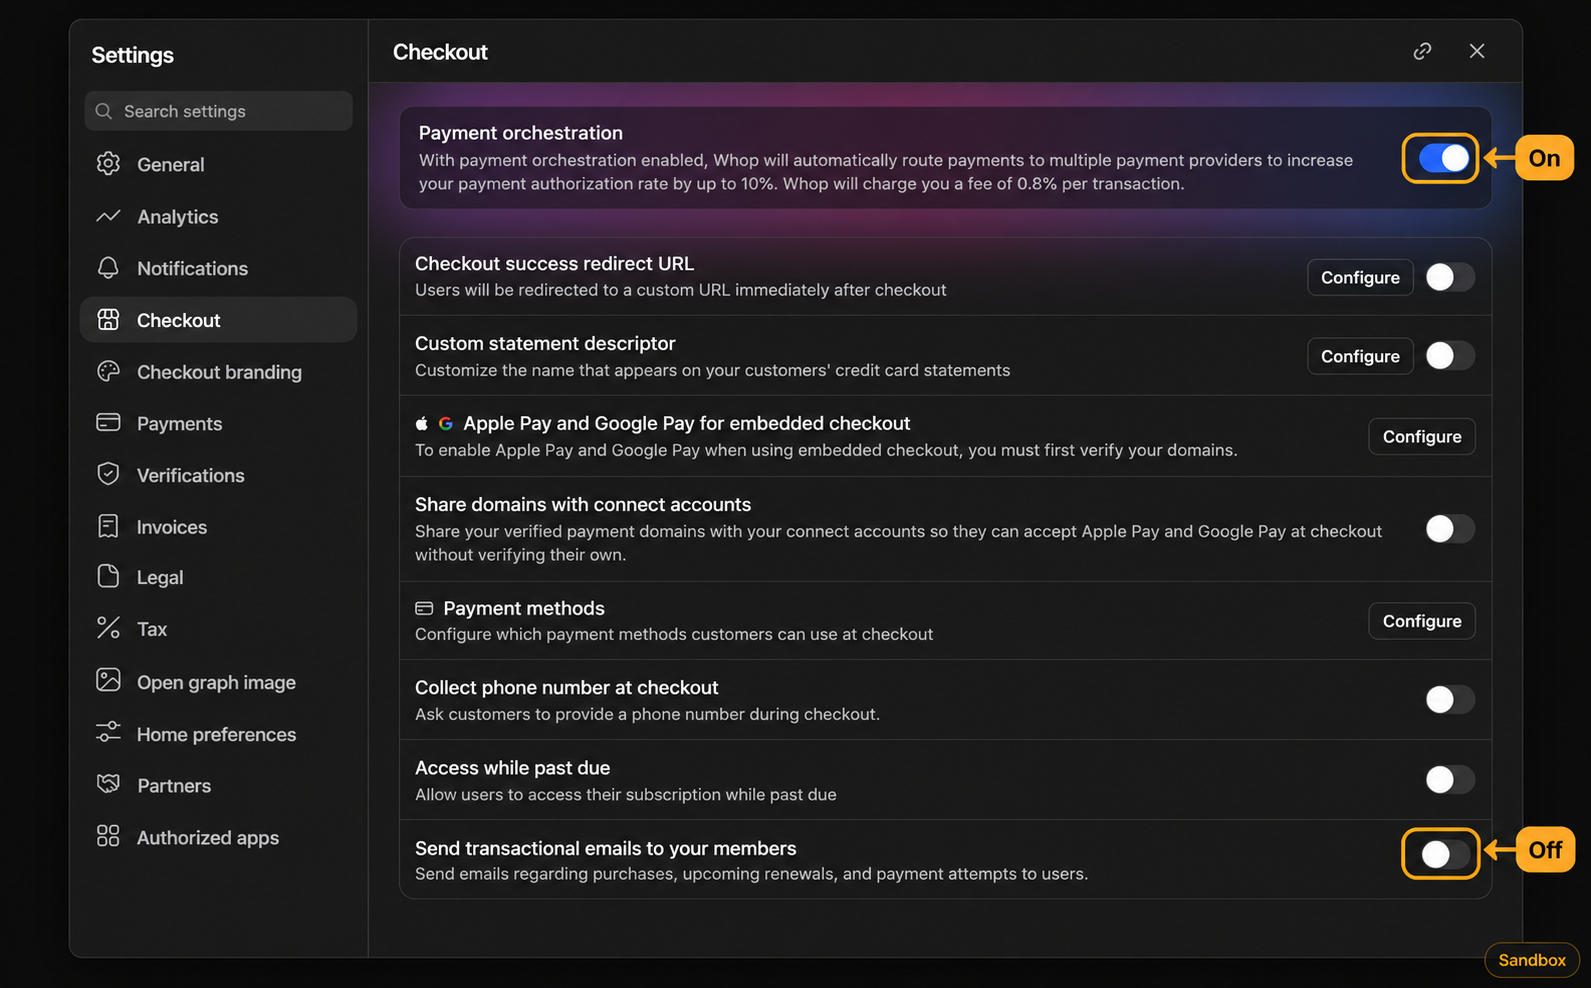
Sandbox: review payment orchestration and transactional emails in Checkout settings.
Optional: a statement descriptor
A statement descriptor is the name your customer sees on their card statement. Next to Custom statement descriptor, choose Configure, enter a short recognizable name, and save. Whop enforces its own length and character rules.
4. Configure Tax
WHMCS calculates the invoice and its tax. Whop only needs to collect the amount WHMCS supplies, without adding a second calculation of its own.
- Open Settings > Tax.
- Open the tax-handling choice.
- Select I'll handle tax myself. Whop may label a different choice "Recommended". That is not this one, so leave it alone.
- Choose Continue, read the confirmation, check its acknowledgements, and confirm.
- Under Checkout on the same Tax page, open Tax type, choose Inclusive, and save.
- Leave Collect VAT IDs from users off. WHMCS handles the customer's tax details.
Done looks like: the saved summary reads I handle tax myself, Tax type reads Inclusive, and VAT ID collection is off. A new Sandbox business can default to Exclusive; that can produce “Whop could not verify inclusive pricing” at checkout even when the connection is Ready.
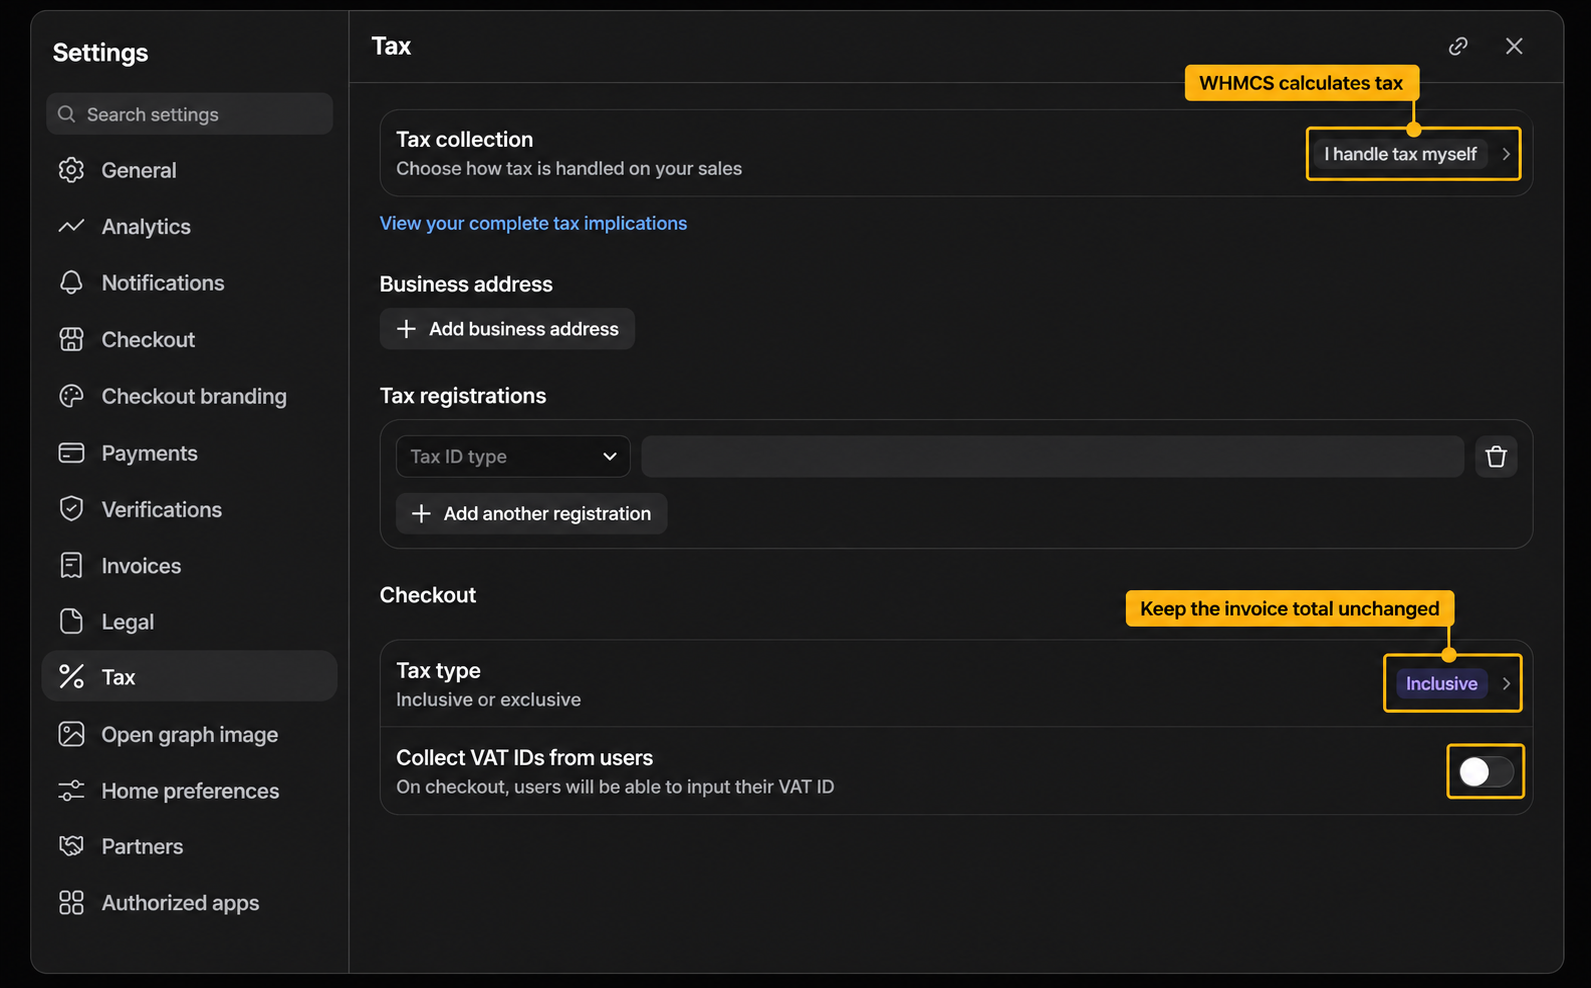
Sandbox: confirm all three tax settings before testing a payment.
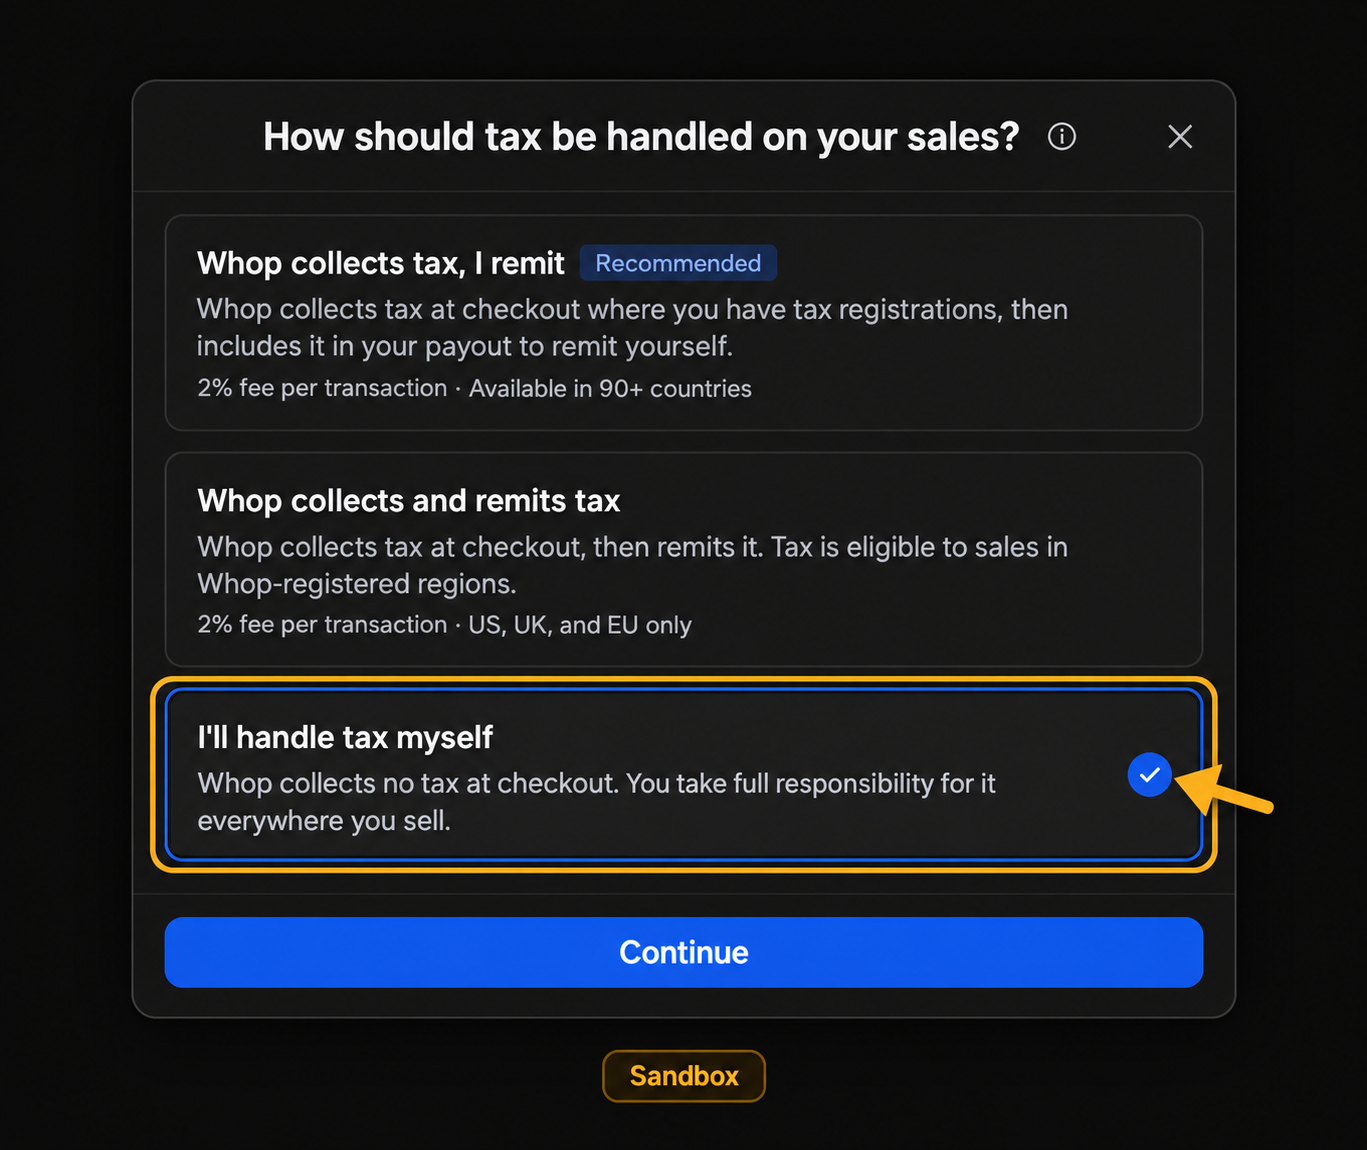
Sandbox: choose to handle tax yourself so WHMCS remains responsible for the invoice tax.
5. Payment methods
Open Settings > Checkout > Payment methods > Configure and check the Card tab. Keep card payments on: the connection needs them. Use public test cards for this walkthrough. Other choices can appear in Sandbox; validate wallets separately on an eligible Live browser and device.
Done looks like: the Card tab is on.
6. Create the Sandbox API key
An API key is the credential WHMCS uses to act on your Whop business. Treat it like a password.
- Open Developer. Under Company API keys, choose Create API key.
- Name it something clear, such as "WHMCS Sandbox".
- Leave Inherit permissions from role set to Custom.
- Select every permission below. Sandbox can show these as raw names instead of friendly labels.
| Group | Permissions |
|---|---|
| Plans and payments | plan:create, payment:charge, payment:basic:read, payment:manage |
| Checkout and saved cards | checkout_configuration:create, checkout_configuration:basic:read, payment:setup_intent:read, member:basic:read, member:email:read, member:payment_methods:read, member:payment_methods:manage |
| Webhooks | developer:manage_webhook |
| Payment cases | payment:dispute:read, payment:resolution_center_case:read |
| Incoming events | webhook_receive:accounts, webhook_receive:payments, webhook_receive:setup_intents, webhook_receive:refunds, webhook_receive:disputes, webhook_receive:resolutions |
| Account visibility | company:balance:read |
That is 21 permissions in total: 20 required operation and event permissions, plus balance visibility. The two member-read permissions let Whop return the customer reference needed to save a card. Search one at a time if the list is long; searching does not clear what you already picked.
- Create the key. Complete Whop's security-code check if it asks for one.
- Copy the key now and keep it somewhere private until the next page.
Done looks like: you are holding a Sandbox API key with all 21 permissions selected.
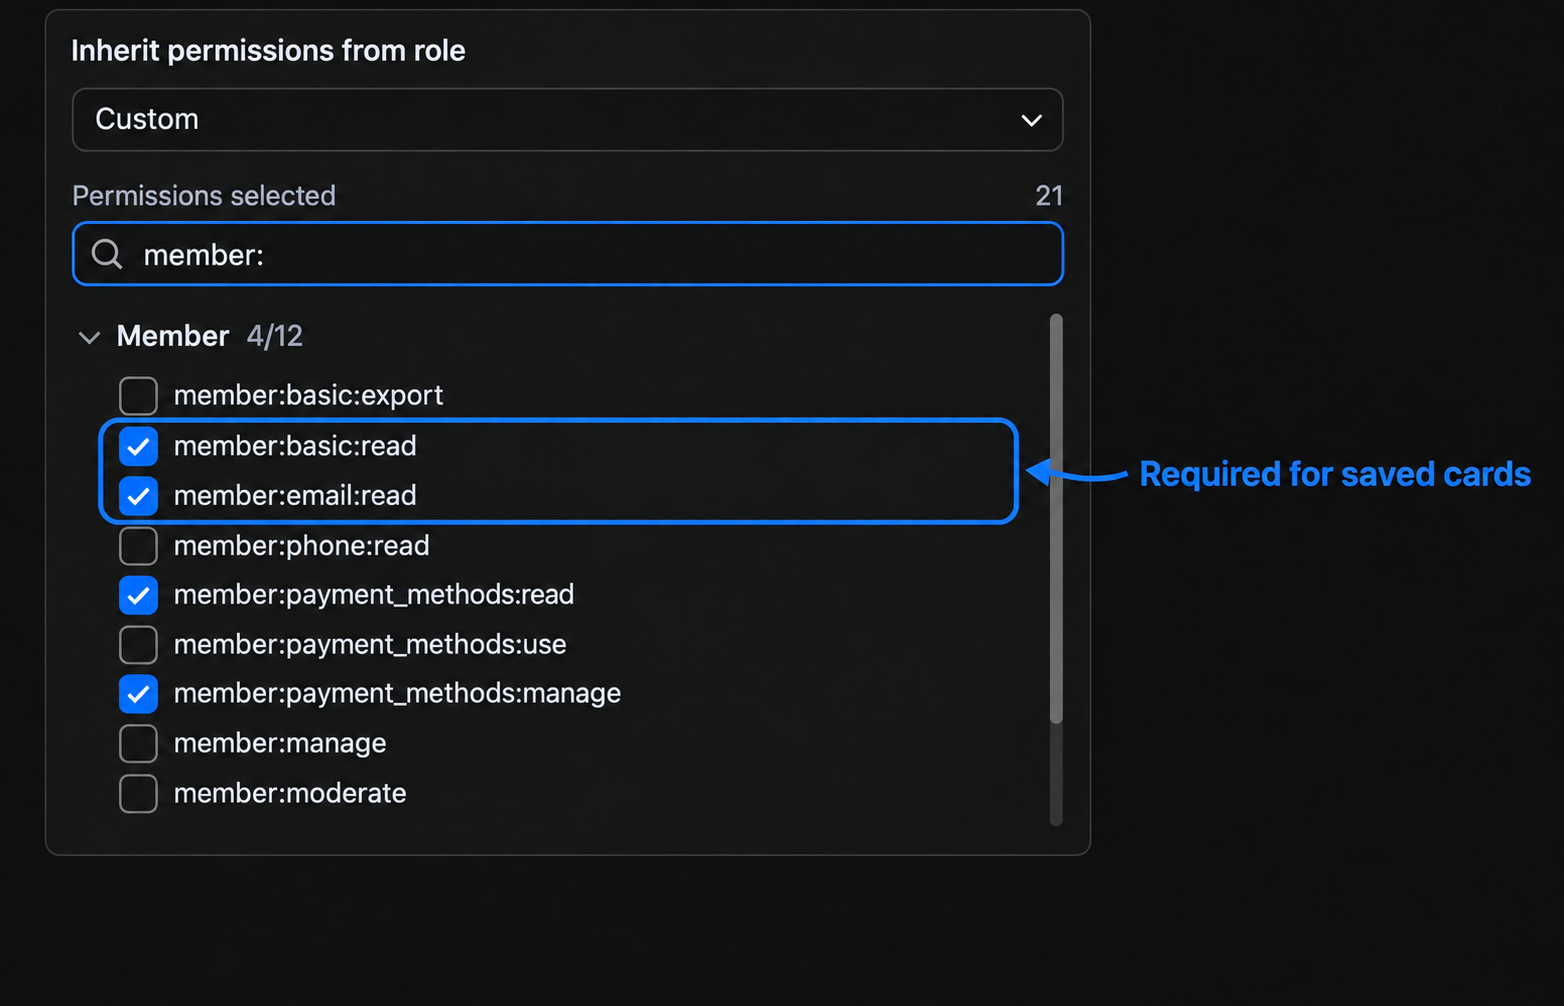
Sandbox: the selected-permission count is 21. The filter highlights the two member-read permissions required for saved cards.
Next: Connect WHMCS to Whop
Updated 16 days ago